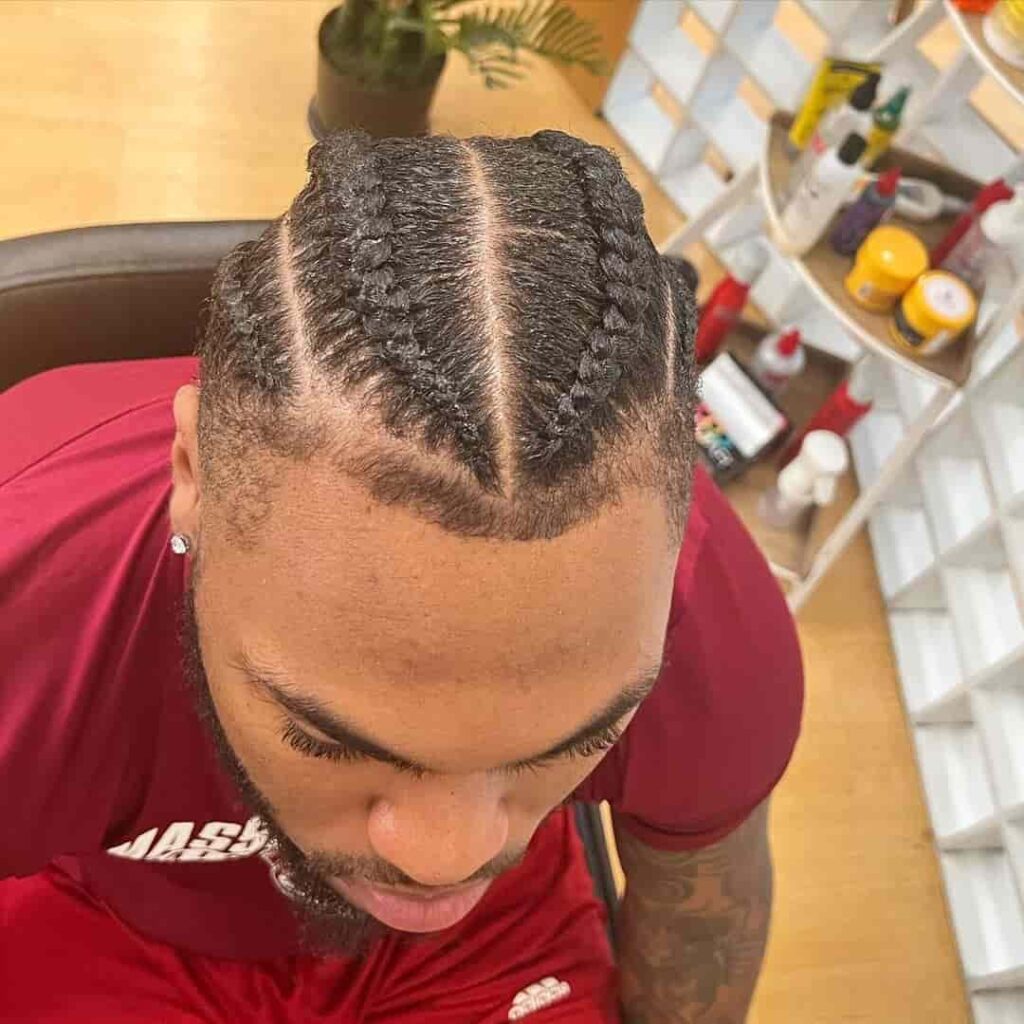
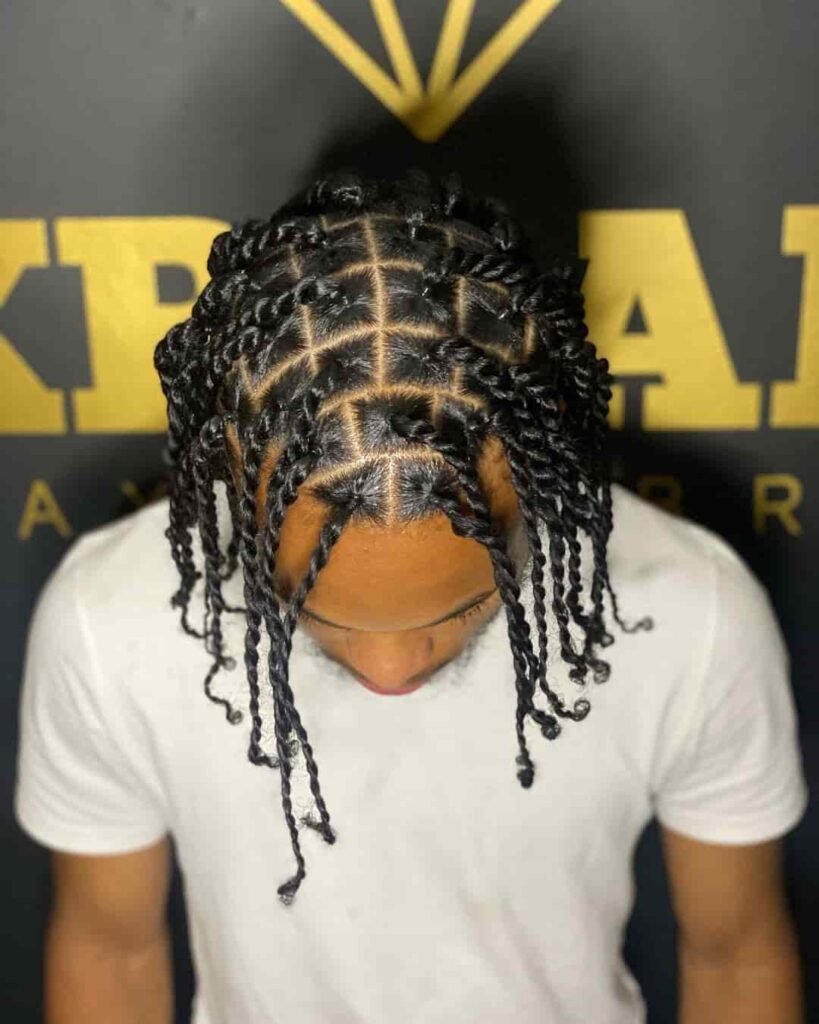
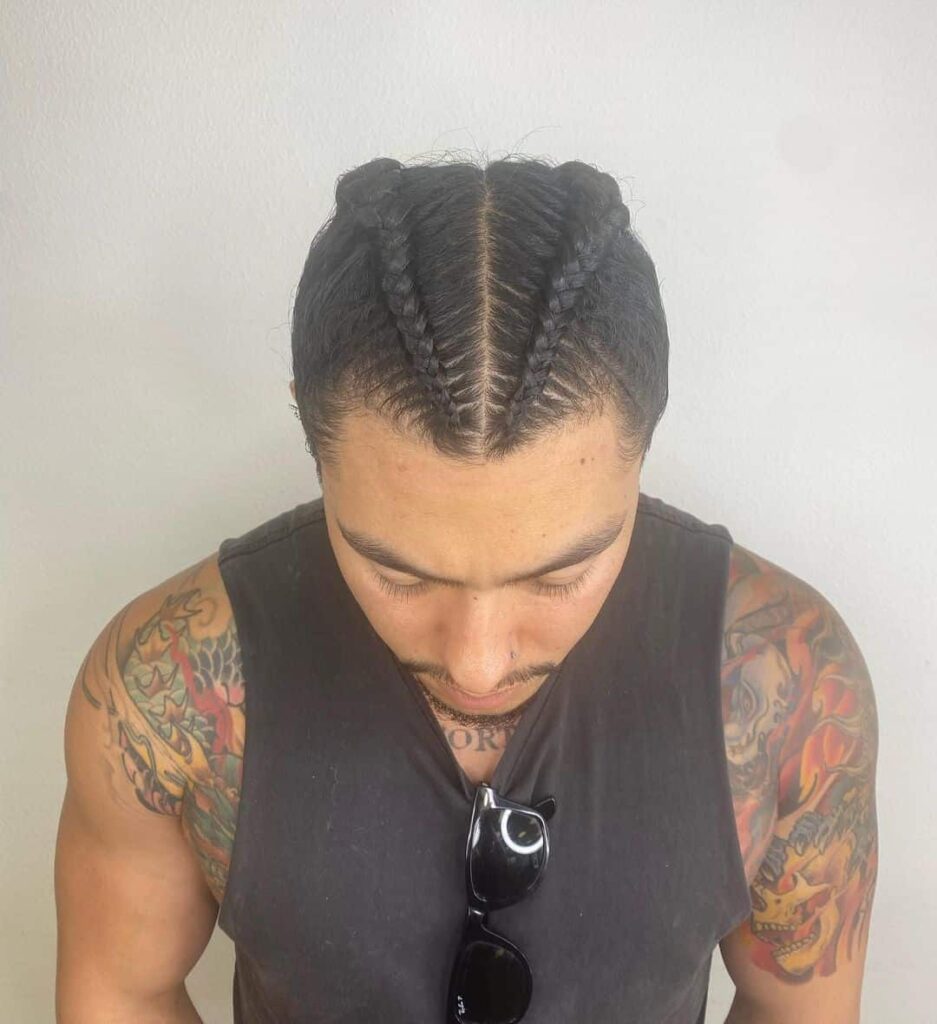
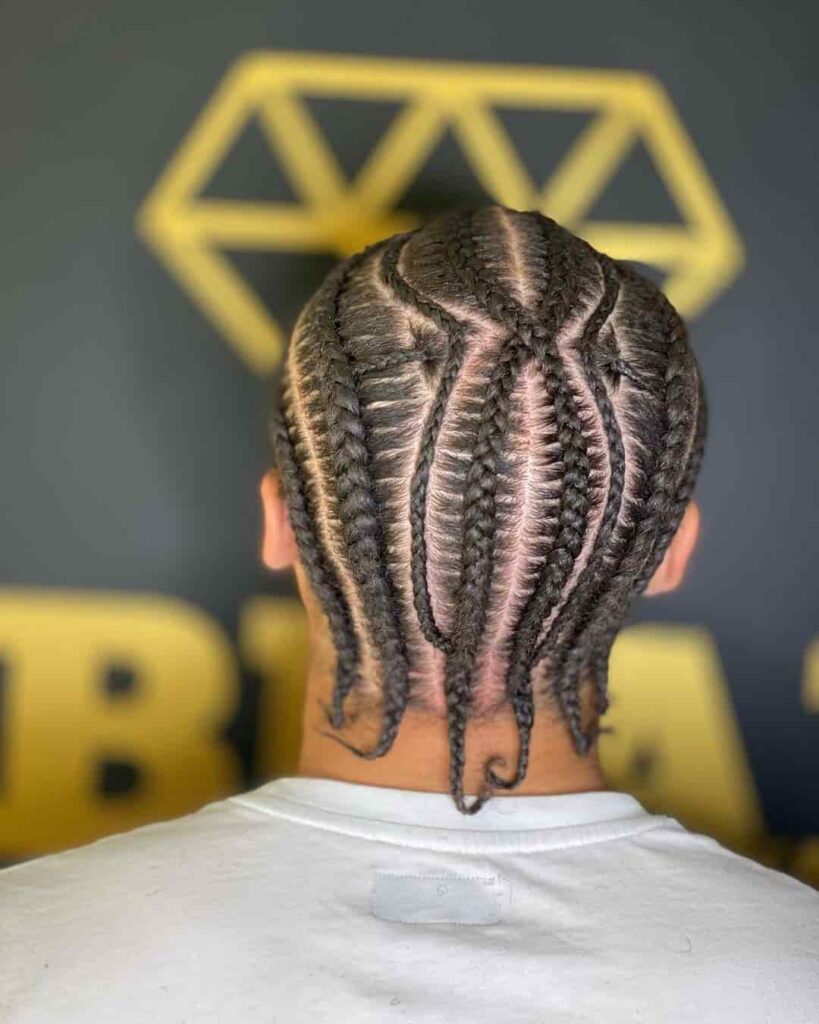
If you're looking for a trendy hairstyle that's not too hard to maintain, then look no further than the Nipsey Hussle braids. In his music videos and performances, Nipsey often wears his hair in braids. The braids are usually large and thick and often have extensions added to them so they look more voluminous.
Nipsey Hussle is a rapper from Los Angeles, California. He was born Airmiess Joseph Asghedom on August 15, 1985, and died on March 31, 2019 after being shot in the head.
Nipsey Hussle had been working as a rapper since his debut mixtape Slauson Boy Volume 1 in 2010. He released several mixtapes over the following years, including The Marathon and The Marathon Continues. His debut studio album Victory Lap was released in 2018 to critical acclaim and commercial success, and he opened two businesses—Marathon Clothing store and Vector 90 coworking space—in 2017 before his death.
Top 8 Inspired Nipsey Hussle Braids
Nipsey Hussel was one of the most influential rappers to come out of Los Angeles. His music and style were both very unique and helped to define an entire generation of music. He was also known for his signature braids which he wore in many different types of styles.
Today we’re going to take a look at some of his best braids, as well as some lesser known ones that you might not have seen before.While these braids might be a little too much work if you're trying to stay low-key, they are still a great option if you want something fun and different on your head!
#1 - Simple and Easy to Wear Stitch Braids

These braids of Nipsey Hussle are small, tight and neat, and they can be done in any color of hair.Stitch braids are small braids that can be done in any part of the head. They are created by weaving each strand around a few times before moving onto the next one. The result is a neat, tight braid that is soft on the scalp and doesn't pull too much at your roots when you take it out.
To get started, make sure you have all your supplies: one or two bags of hair extensions (depending on how much coverage you want), the weave cap, and some bobby pins. First, separate the extensions into equal parts so you've got enough for each side of your head.

Then start braiding one extension into each braid—you can do this by hand or with a comb if it's easier for you. Once all four braids are complete, secure them with bobby pins so no loose strands are hanging out from underneath your cap! Then put on your cap and go about your day!
#2 - Fully-Long Trend Braids

Whether you're looking for a way to spice up your look or want something a little more low-key, the fully-long trend braid is the perfect choice. Just like Nipsey Hussle Braids, this style features soft, wavy extensions that are woven into a tight plait with a natural finish at the end. These look amazing on anyone, but especially great on people with thinning hair, since the braid will give your hair the illusion of thickness and volume. The best part is that they'll stay in place all day long!
Here's how to do it: First, section off your hair into three sections—left side, right side, and back (see below). Then divide each section into three more sections, keeping them all even. Now divide those smaller sections into three more sections (again making sure they're all even). Then divide those small sections into three more sections (again making sure they're all even).

Next take the left side braid and start braiding it towards the center of your head. When you get to about halfway up your head pull out some pieces from each side and add them into the braid so it becomes fuller looking on top than on bottom. Do this with all three sections of hair on either side of your head so that they all have fullness.
#3 - Sleek and Clean 6 Feed-in Braids

A 6 Feed-in Braids is a hairstyle that takes inspiration from Nipsey Hussle braids and it has its own name because of its unique pattern. The braids are woven into a single braid, which is then woven again around itself to create an extra thick braid. The first two braids are each about twice as thick as the rest. This makes for a very striking hairstyle!
This hairstyle is constructed by first dividing the hair into two parts, then making a 4 Feed-in braid in each part. For example, if you had 6 sections of hair and wanted to make a 6 feed-in braid out of it, you would divide your hair into two sections and then make 4 feed-in braids in each section. You would then take one strand from each side of the outermost braid and weave them into the middle section. The result will be one large 6 Feed-in Braid!
#4 - Bold Short Braids

First, let's talk about short hair braids which were inspired from Nipsey Hussle braids. If you have short hair and want to try something new, braids are a great option. This style is a braid in front of your hair or a braid all along the length of your head. Either way, you'll end up with an ultra-cool hairstyle that's perfect for summer!
To get this look, all you need to do is to wash your hair and then apply a light moisturizer so that your hair isn't too dry. This will help keep your hair from getting tangled up in the braids (and make them easier to remove).Next, grab some bobby pins and divide your hair into sections. You'll want to separate each section into two or three pieces depending on how big your braid is going to be.

Once you have all of your sections separated, start braiding! Start at the bottom left-hand side of your head and work your way up through each section until you reach the top right-hand side of your head (or wherever else you want your braid). Once there, just keep on going until all of your braids are done!
Finally, let them dry overnight before taking them out because they're likely to be pretty tight when they're first applied—so give them some time before trying to undo anything!
#5 - Fresh and Cool Box Braids

These fresh and cool Box braids are a type of braid that's made up of square-shaped portions from which plaits are made. They dangle loosely, in contrast to cornrows which are close to the scalp. Braids can be made of real hair or hair extensions, and they can be little or large. It is a versatile way to add length and volume to your hair. They're also a great way to keep your edges under control, as they keep them from getting all frizzy in the summer heat.
To style these braids, first, have a look at your hair. If it's straight, you might want to wash it and put some product in it before starting the braiding process. If you're going to be wearing braids for a while (more than a few days), then consider using oil on your scalp to prevent dryness and itchiness. Once your hair is washed and moisturized, gather up some hair from the back of your head and start braiding!
Once all of your hair is braided, tie them off with an elastic band or two so that they don't come loose. You can also use clips if you don't want them tied off. Make sure that everything is secure before proceeding with styling—you don't want any stray hairs!
Now comes the fun part: styling! To get volume with box braids, use volumizing spray or powder on your roots after washing them—this will provide lift and make the braids look fuller.
#6 - Unique and Neat Zig Zag Braids

These unique and neat Zig Zag braids have a lot of different variations, but they all have one thing in common: they create a zigzag pattern in your hair. This can be done by alternating the direction of each braid, or by twisting two braids together to make one braid that looks like a zig zag. This is a fun and easy way to spice up your look. It's great for those who want to try something new, but don't have the patience or skill for more complex styles.
To create this look, you simply need to divide your hair into three sections. Then, take one section and cross it over the center section in front of it. Then, take another section and cross it over the center section, in front of the first section you crossed over. Continue doing this until all of your hair has been braided.
#7 - Vibrant Twisted Cornrow Braids

This hair inspired Nipsey Hussle Braids features the most basic version wherein there are just two braids that are twisted together at the ends. This is a tight, simple style that is perfect for shorter hair. The style works well on people with any hair type, but it's especially great for those who have fine or thinning hair because it helps to add volume and texture.
To create this look, you will need a small-to-medium section of hair at the top of your head. Make sure your part is straight and clean before you begin braiding.Starting from the front of your head and about an inch below your parting line, take a small section of hair that is about 1/3 of an inch in size and divide it into 3 equal parts.
Take one part and cross it over the other two sections so they form a "Y" shape with the middle section at the bottom point of the "Y". This will be your starting point for braiding.Braid each layer until you reach the ends then secure them with an elastic band or rubber band as desired. Let them hang loose or tie them into a ponytail at whatever length suits your needs best!
#8 - Modern Mix-Matching Braids

Mix-matching of tiny, small and big braids is a trend that has been around for a while now. It is all about the ability to create different looks with the same hairstyle. These are a mix of very small strands of hair that are braided in a way so as to form a pattern that resembles an animal print and with tiny braids but have bigger strands of hair.
To style mix-matching braids, start by brushing the hair down. This will make it easier to braid it later on. Then divide the hair into sections based on which type of braid you want to make: tiny, small or big. For each section of hair, use a different color rubber band so they're easy to tell apart!

For tiny braids, divide each section into three parts and tie them off tightly with rubber bands at the end of each section. Then braid these three sections together in an overhand knot until you reach the end of the section (where there should be two rubber bands).
Remove one rubber band from this end of the braid and place it under all three strands of your tiny braid before tying off again with another rubber band at the end of this new piece of hair that has been added to the original braid (which should now have four strands). Repeat this process until you reach your desired length for your tiny braid!
Read More:
25 Medium Length Hairstyles for Men with Thick Hair


